Showing posts with label Real Food. Show all posts

Wednesday, March 12, 2014

Recipe: Not Your Blue Box Mac and Cheese

Oh mac and cheese, 
Who doesn't love a good comfort food
or have it as a staple as a childhood favorite. 

It's so easy to have mac and cheese these days,
and most people grab for that beloved little blue box.

Sadly, that little blue box doesn't love us back...

.. Most of us forget to turn to the ingredient list 
and see what's REALLY in the food we eat.

.. petroleum base dyes and GMO wheat. 
(scary! this can be proven to link to hyperactivity in children) 

Sorry little blue box, 
you are no more welcome for my family to eat!

But how can you give up your kid friendly go-to lunch?

No need, just make your own REAL mac and cheese.

Its easier than you think and you only need THREE ingredients!
Yes, I did just say three ingredients.. Milk, cheddar cheese and noodles! 


Home-style Mac & Cheese
Serves 4

1. Place 3 cups of milk into a saucepan and combine with 2 cups elbow macaroni (I used organic light wheat)
2. Heat to a low boil. Reduce heat and simmer for about 10 minutes or until tender. Making sure to stir here and there so your noodles don't burn. 

3. Once noodles are tender, mix in (roughly)1 1/2 cups of freshly grated cheddar cheese until melted. If you'd like it creamier, mix in a few more tablespoons of milk
*may add a dash of salt if you prefer for taste.

4. Once everything is combined and melted, serve up in some bowls and enjoy!


 ** Want to know about the dangers of the "little blue box" - check out Food Babe and her article warning against it.


Friday, February 21, 2014

Recipe: Avocado Egg Breakfast

Avocados is a great fruit to add to your morning diet. According to MedicalNewsToday.com avocados have numerous health benefits such as healthy fats, vitamins, fiber and protein. I like to start my morning off with a nutritional energy and protein packed boost and this is my go-to breakfast addition. Its so simple! Tasty additions are salsa, chives or salt and pepper.

Ingredients and Tools:
2 avocados
2 eggs
Cutting board
Knife
Spoon
Muffin Tin
Oven

Directions:
1. Preheat oven to 425 degrees and cut the avocados in half.


2. Take out the pit. Spoon out a small amount of the "guts" to create room for the egg.


3. Place avocados in muffin tin


4. Crack eggs and pour into avocado. 


5. Set pan in oven and let bake for 15-20 minutes.


Enjoy!


Friday, February 14, 2014

Recipe: No Fry French Fries


I love french fries but I don't love the unhealthy benefits of them. I found out how to make my own french fries that are extremely tasty and curb my craving.

Ingredients and tools:

  • Baking Sheet
  • Oven
  • Paper towels or napkins
  • 2 large potatoes, peeled.
  • 2 tablespoons olive oil
  • 3/4 teaspoon salt

Directions:
  1. Heat oven to 400.
  2. Cut potatoes in half horizontally; cut each half into fry sized pieces.
  3. Place in a bowl of cold water.
  4. Remove from water and dry thoroughly.
  5. Toss with oil and sprinkle with salt.
  6. Place fries on baking sheet
  7. Bake until brown; flip occasionally.


Healthy Hint: you may substitute for other oils or potatoes.

Monday, February 3, 2014

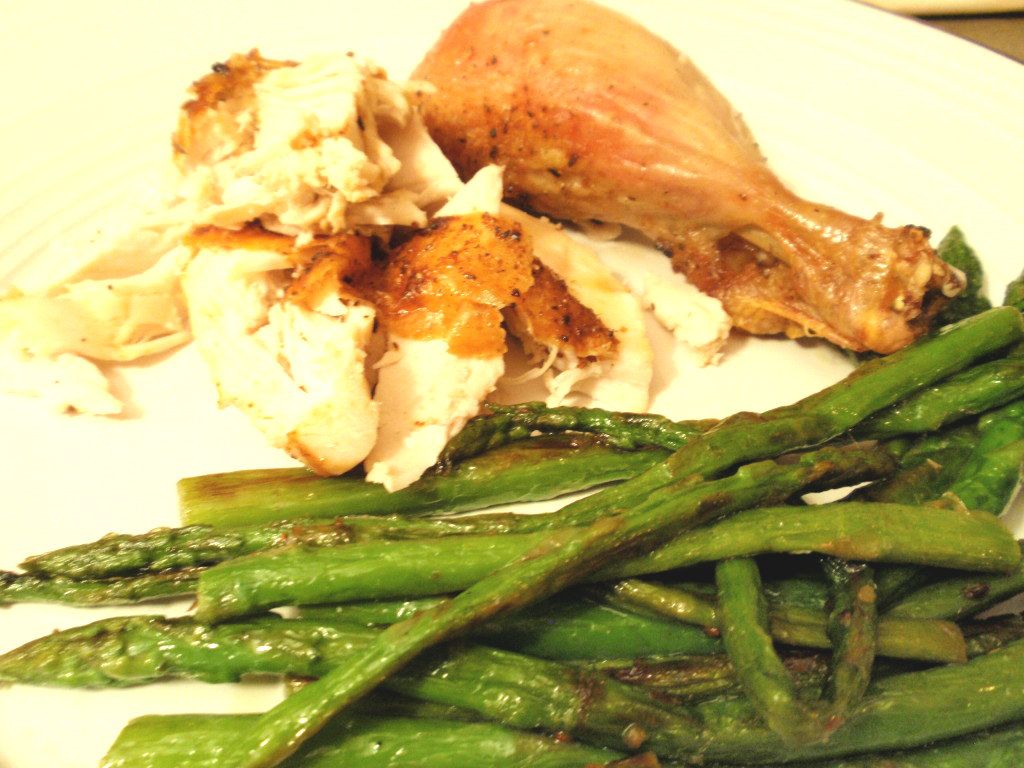
Recipe: Juicy Roasted Chicken

Have you ever wanted to roast your own chicken, but the though of prepping it and roasting it yourself is just scaring you away? Never fear! It is WAY easier than you think. Whether you are a seasoned pro in the kitchen or just learning how to cook, this recipe is for you!

My husband is not a fan of chicken, unless it's moist and hidden within dishes.  So, I'm always trying new chicken recipes that he will enjoy.
Tonight was my second time making this recipe and both times was absolutely delicious. The celery keeps it so moist and the meat falls right off the bone. Plus, we now have lots of leftovers for future recipes!


What you need:
1 (3 lb) whole chicken- with giblets removed
1 celery stalk, cut into 3 larger pieces
1/2 c. butter
1 tsp garlic powder
Salt and Pepper to taste

Step 1: Preheat oven to 350 degrees

Step 2: Place chicken in roasting pan. Add 3 tablespoons and celery pieces inside the chicken cavity.

Step 3: Rub the remaining butter all over the outside of the chicken. Season with salt, pepper, and garlic powder.

Step 4: Bake uncovered for 1 hr 45 min (until internal temperature reaches 180 degrees). Remove from heat and let rest for 15 minutes before cutting.


Monday, January 27, 2014

Recipe: Quick 'N' Easy Bacon Green Beans

Need a quick 'n' easy side dish to go with your protein?

Here is my all time favorite "go-to" side dish recipe!


What is great about this recipe is that you can customize it to feed 
your family or a crowd. 

I promise there is no real science to it...

but for those who need measurements (i usually eye-ball it)
here some basic ones....

What you need:
1 lb fresh green beans (trimmed)
1/2 Tbs minced garic
3-4 strips of bacon, sliced
3 Tbs Grapeseed oil or a clean oil of choice 


Step 1: Rinse and trim your green beans

Step 2: Slice bacon into little chunks, add to a medium sized skillet pan. Heat on medium heat for 1 minute.

Step 3: Add beans and garlic to the skillet with  bacon.

Step 4: Drizzle the grapeseed oil over beans, just enough to lightly coat when mixed. 
( I love grapeseed oil because its cholesterol free and one of the cleanest oils. Plus it has a higher burn temp, so it doesn't smoke in your eyes like olive oil)


Step 5: Saute on medium heat roughly 5 minutes or until bacon is cooked and you achieve desired tenderness (I like mine with a little sauteed color to them..yum!)


Serve with your favorite protein!

Enjoy!!


Wanna try a little twist?

Variation: Sub out the green beans for some fresh sliced Brussels spouts!


Happy Cooking!


Sunday, January 26, 2014

Recipe: Whole Wheat Penne with Mushrooms and Artichokes

So recently I have been on a hunt for new recipes
to switch up our "normal" rotation of meals. 
Winter can be so gloomy, so what better than a nice pesto pasta.

Usually in the summer I make homemade pesto,
since we have an abundance of fresh basil on hand.
But since its winter,
and I failed to grow basil inside this year,
store bought pesto had to do.


I found this recipe from the Flat Belly Diet Cookbook.
(I admit, I changed a few things slightly. I can't seem to just leave a recipe alone!)

I really liked this recipe,
because most of the ingredients I usually have on hand
or are easily accessible in our local grocery store.
As a mother of two small children,
quick and easy is a MUST.

What you need:
6 oz whole wheat penne pasta
3 Tbs evoo  or grapeseed oil
8 oz sliced mushrooms
1 small sweet or red onion, chopped
2 cloves garlic, minced
1 large tomato, chopped
1 (14 oz) can artichoke hearts, drained and slightly chopped
1/4 c. pesto
5 tsp. grated Parmesan cheese (for topping)
salt and pepper to taste

Step 1: In a large pot, bring water to boil. Add penne and cook according to package directions.
Drain and toss with 2 tbs evoo.
Step 2: Heat 1 tbs evoo in large nonstick pan on med-high heat. Saute mushrooms and onion for about 6 minutes until juices start to caramelize.
Step 3: Add garlic and artichokes, saute 1 minute. Add tomatoes and cook until softened.
Step 4: Add pasta and pesto. Toss to combine. Add salt and pepper to taste.
Step 5: sprinkle with Parmesan cheese. Serves 4

Happy Cooking!


Monday, January 20, 2014

Recipe: Cauliflower Pizza Crust

I am obsessed with cauliflower...I am. I'll admit it.
Its so easy and delicious!

Cauliflower is an easy veggie to incorporate into any meal. Its high in vitamins and important nutrients.
It cooks fast so its great for roasting or steaming. Avoid boiling because it will lose a portion of its nutrients...boo for lost nutrients.
My favorite is to toss it in grapeseed oil and roast it with some garlic.
If you have not tried it roasted, please do. Amazing!

So when I heard about cauliflower pizza crust,
I knew I had to try it. 

Plus, what a great way to sneak in some veggies and its gluten free!


Makes 2 personal sized pizzas

What you need:
1 medium sized cauliflower head
1/4 c grated Parmesan cheese 
1/3 c Mozzarella cheese 
1 tsp salt
1/2 tsp basil
1/2 tsp oregano
1/2 tsp garlic powder
1 egg


Step 1: Cut up the cauliflower head into smaller chunks. Discard the green stem. 
Preheat over to 420 degree F.

Step 2: Place cauliflower chunks into food processor and mince for about 30 seconds until get you a fully texture.

Looks light and fluffy like this!
Step 3: Place your fluffy mixture into a microwave safe bowl. Cover (I used a small plate) and microwave for about 5 minutes. This will steam it.

Step 4: Once done steaming, let it cool. Trust me..its hot! Then place your fluff into a clean tea towel or paper towel. You want to try pat out as much moisture as possible. Otherwise you'll end up with soft crust and no one wants that.

Step 5: Place cauliflower back into the bowl and add the cheese, seasonings and egg. Mix well. 

Step 6: Line your baking sheet with a piece of parchment paper. Lightly grease with oil. Place your mixture into 2 piles on your pan. Pat down mixture and form a crust circle shape. 
Make sure to not have it too thick. 


 Step 7: Bake at 420 degrees (temp for parchment paper) for roughly 15-20 minutes. This time will all depend on your oven and thickness of crust. So watch until its forms a golden color. 

Step 8: Take out and add your favorite pizza sauce and toppings.


Step 9: Bake for 10 more minutes until your cheese is melted and starting to turn golden.

Step 10: Take out of oven and enjoy!!


MMmmm... Yummy!


Happy Cooking!


01 09 10