Showing posts with label Healthy Recipes. Show all posts

Friday, February 21, 2014

Recipe: Avocado Egg Breakfast

Avocados is a great fruit to add to your morning diet. According to MedicalNewsToday.com avocados have numerous health benefits such as healthy fats, vitamins, fiber and protein. I like to start my morning off with a nutritional energy and protein packed boost and this is my go-to breakfast addition. Its so simple! Tasty additions are salsa, chives or salt and pepper.

Ingredients and Tools:
2 avocados
2 eggs
Cutting board
Knife
Spoon
Muffin Tin
Oven

Directions:
1. Preheat oven to 425 degrees and cut the avocados in half.


2. Take out the pit. Spoon out a small amount of the "guts" to create room for the egg.


3. Place avocados in muffin tin


4. Crack eggs and pour into avocado. 


5. Set pan in oven and let bake for 15-20 minutes.


Enjoy!


Monday, February 17, 2014

Recipe: Crock Pot Teriyaki Chicken

Calling all busy Ladies!!

Here is a great crock pot and freezer friendly meal! 
For those who are just joining us, you will soon learn that I am a little obsessed with freezer friendly meals. Soo easy!

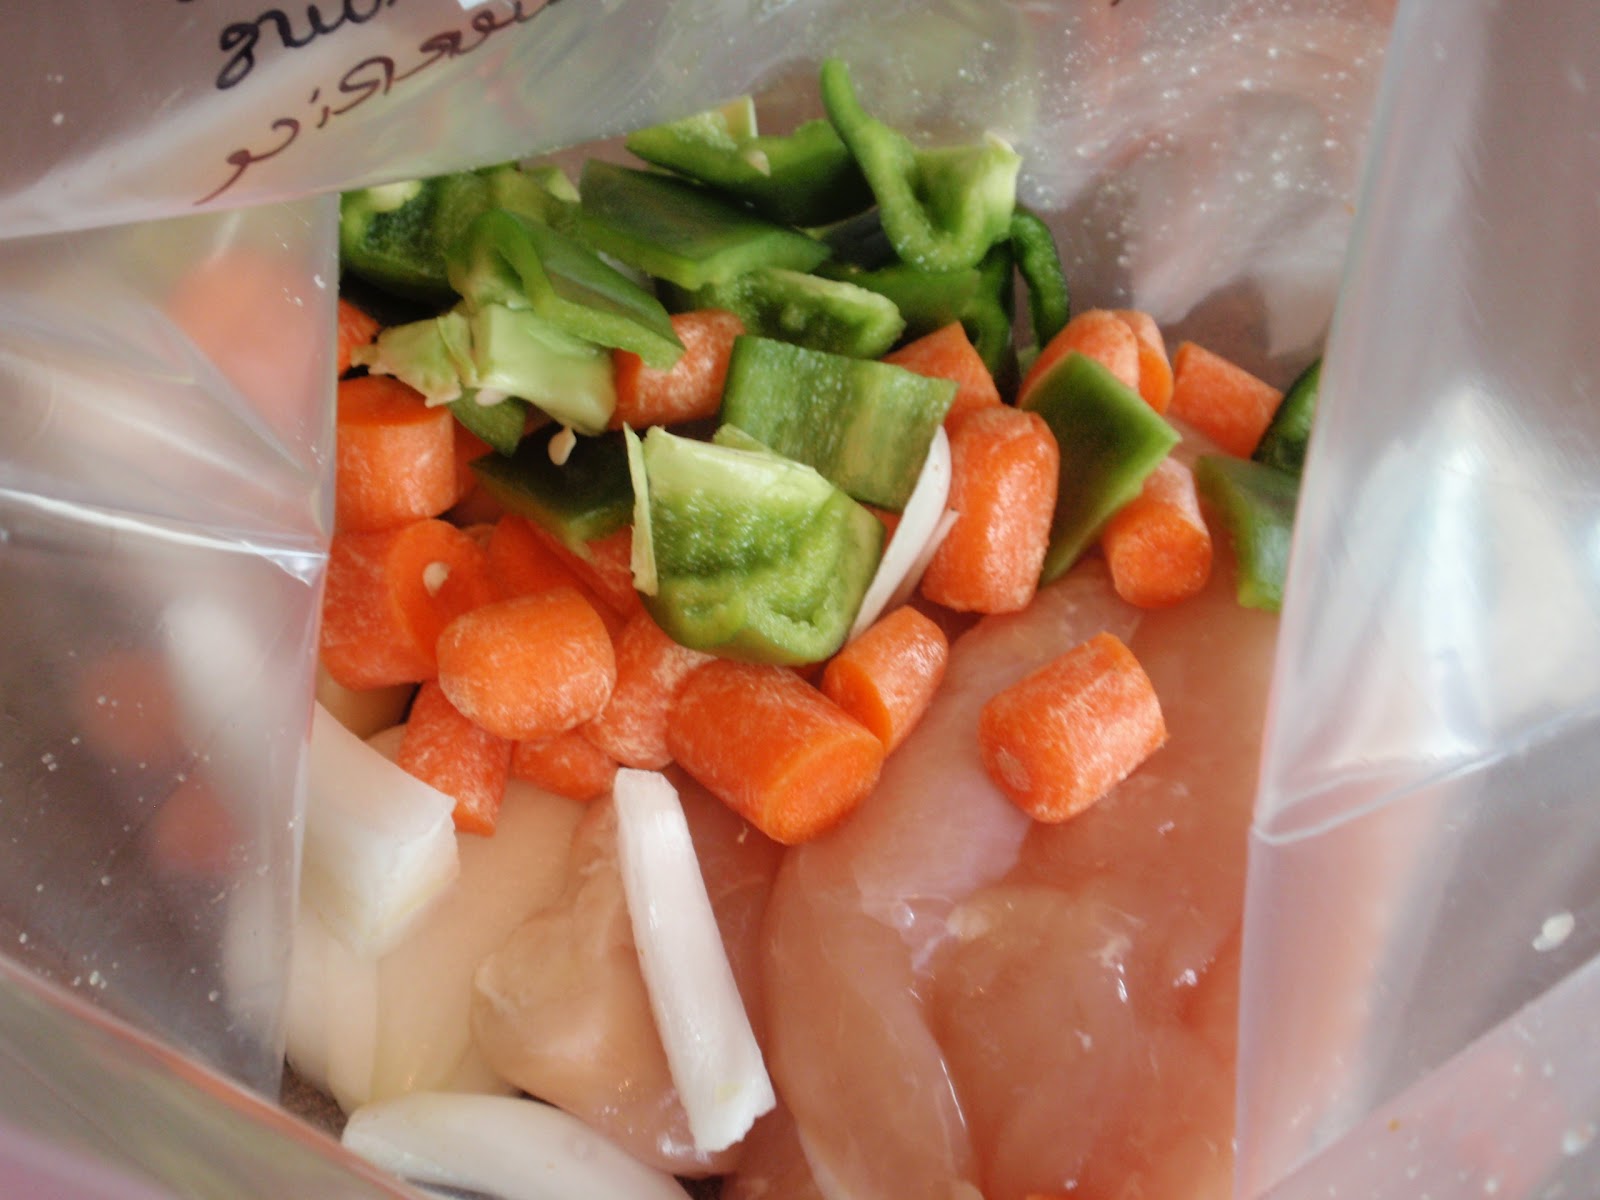
  Today I made Teriyaki Chicken over Rice. SUPER EASY! The best thing about this recipe too is that you can prep it before hand and freeze it all in a Ziploc freezer bag (my new best friend). Thaw and then dump it all into your slow cooker! Dinner is ready when you come home and only one bag to throw away! Easy clean up.


Makes two meals with 4 servings each.
(I made one today in the crock-pot and saved the other in the freezer for an easy meal later this month!)


What you need:
- Ziploc freezer bag (to store second meal)
- White rice
- 1 large can pineapple (undrained)
- 1 large onion (cut into large chunks)
- 1 medium bag of carrots
- 4 cloves garlic
- 1 green pepper- chopped in large chunks (optional: I have tons in the garden to use up)
- 4 chicken breasts- cut in half (I used tenderloins instead)
- 1 cup teriyaki sauce (if need GF, check label! there are some brands without wheat)
- Ginger powder to taste

Step 1: Cut up all veggies

Step 2: Label extra bag with directions and content.
           -Add 1/4 cup teriyaki sauce
           -Cook on High-4 hours/ Low 8 hours
           -Serve over rice

Step 3: Add meat to bag and crock-pot

Step 4: Divide veggies and all other ingredients between the bag and cock-pot.

Step 5: Start crock pot for desired time. Press air of our bag, seal and freeze for a later meal (lay flat to freeze)


Step 6: Serve over hot rice when done.

This meal took me 10 minutes to prep. I now have a meal ready with barely any work and PLUS a meal with no prep later this month :)

 **When ready to use the frozen meal. Move to refrigerator to thaw (enough to slide out of bag), place contents of the bag in crock pot, turn on, and dinner will be ready when you get home!

Happy Cooking!

Monday, February 3, 2014

Recipe: Juicy Roasted Chicken

Have you ever wanted to roast your own chicken, but the though of prepping it and roasting it yourself is just scaring you away? Never fear! It is WAY easier than you think. Whether you are a seasoned pro in the kitchen or just learning how to cook, this recipe is for you!

My husband is not a fan of chicken, unless it's moist and hidden within dishes.  So, I'm always trying new chicken recipes that he will enjoy.
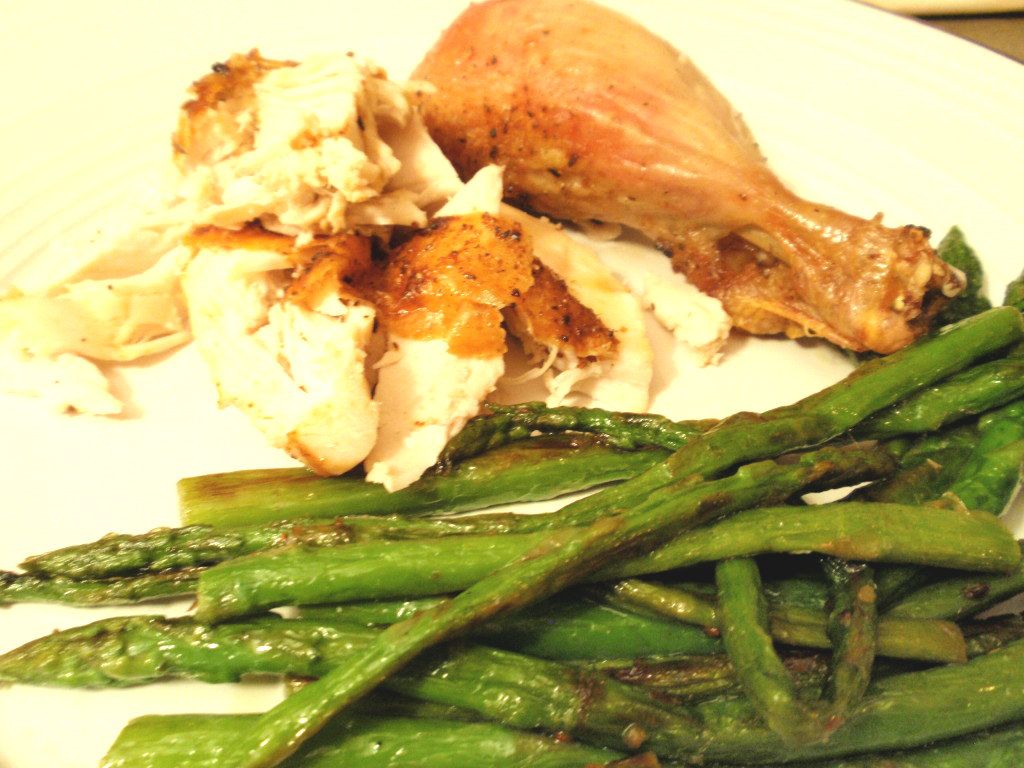
Tonight was my second time making this recipe and both times was absolutely delicious. The celery keeps it so moist and the meat falls right off the bone. Plus, we now have lots of leftovers for future recipes!


What you need:
1 (3 lb) whole chicken- with giblets removed
1 celery stalk, cut into 3 larger pieces
1/2 c. butter
1 tsp garlic powder
Salt and Pepper to taste

Step 1: Preheat oven to 350 degrees

Step 2: Place chicken in roasting pan. Add 3 tablespoons and celery pieces inside the chicken cavity.

Step 3: Rub the remaining butter all over the outside of the chicken. Season with salt, pepper, and garlic powder.

Step 4: Bake uncovered for 1 hr 45 min (until internal temperature reaches 180 degrees). Remove from heat and let rest for 15 minutes before cutting.


Sunday, January 26, 2014

Recipe: Whole Wheat Penne with Mushrooms and Artichokes

So recently I have been on a hunt for new recipes
to switch up our "normal" rotation of meals. 
Winter can be so gloomy, so what better than a nice pesto pasta.

Usually in the summer I make homemade pesto,
since we have an abundance of fresh basil on hand.
But since its winter,
and I failed to grow basil inside this year,
store bought pesto had to do.


I found this recipe from the Flat Belly Diet Cookbook.
(I admit, I changed a few things slightly. I can't seem to just leave a recipe alone!)

I really liked this recipe,
because most of the ingredients I usually have on hand
or are easily accessible in our local grocery store.
As a mother of two small children,
quick and easy is a MUST.

What you need:
6 oz whole wheat penne pasta
3 Tbs evoo  or grapeseed oil
8 oz sliced mushrooms
1 small sweet or red onion, chopped
2 cloves garlic, minced
1 large tomato, chopped
1 (14 oz) can artichoke hearts, drained and slightly chopped
1/4 c. pesto
5 tsp. grated Parmesan cheese (for topping)
salt and pepper to taste

Step 1: In a large pot, bring water to boil. Add penne and cook according to package directions.
Drain and toss with 2 tbs evoo.
Step 2: Heat 1 tbs evoo in large nonstick pan on med-high heat. Saute mushrooms and onion for about 6 minutes until juices start to caramelize.
Step 3: Add garlic and artichokes, saute 1 minute. Add tomatoes and cook until softened.
Step 4: Add pasta and pesto. Toss to combine. Add salt and pepper to taste.
Step 5: sprinkle with Parmesan cheese. Serves 4

Happy Cooking!


Monday, January 20, 2014

Recipe: Cauliflower Pizza Crust

I am obsessed with cauliflower...I am. I'll admit it.
Its so easy and delicious!

Cauliflower is an easy veggie to incorporate into any meal. Its high in vitamins and important nutrients.
It cooks fast so its great for roasting or steaming. Avoid boiling because it will lose a portion of its nutrients...boo for lost nutrients.
My favorite is to toss it in grapeseed oil and roast it with some garlic.
If you have not tried it roasted, please do. Amazing!

So when I heard about cauliflower pizza crust,
I knew I had to try it. 

Plus, what a great way to sneak in some veggies and its gluten free!


Makes 2 personal sized pizzas

What you need:
1 medium sized cauliflower head
1/4 c grated Parmesan cheese 
1/3 c Mozzarella cheese 
1 tsp salt
1/2 tsp basil
1/2 tsp oregano
1/2 tsp garlic powder
1 egg


Step 1: Cut up the cauliflower head into smaller chunks. Discard the green stem. 
Preheat over to 420 degree F.

Step 2: Place cauliflower chunks into food processor and mince for about 30 seconds until get you a fully texture.

Looks light and fluffy like this!
Step 3: Place your fluffy mixture into a microwave safe bowl. Cover (I used a small plate) and microwave for about 5 minutes. This will steam it.

Step 4: Once done steaming, let it cool. Trust me..its hot! Then place your fluff into a clean tea towel or paper towel. You want to try pat out as much moisture as possible. Otherwise you'll end up with soft crust and no one wants that.

Step 5: Place cauliflower back into the bowl and add the cheese, seasonings and egg. Mix well. 

Step 6: Line your baking sheet with a piece of parchment paper. Lightly grease with oil. Place your mixture into 2 piles on your pan. Pat down mixture and form a crust circle shape. 
Make sure to not have it too thick. 


 Step 7: Bake at 420 degrees (temp for parchment paper) for roughly 15-20 minutes. This time will all depend on your oven and thickness of crust. So watch until its forms a golden color. 

Step 8: Take out and add your favorite pizza sauce and toppings.


Step 9: Bake for 10 more minutes until your cheese is melted and starting to turn golden.

Step 10: Take out of oven and enjoy!!


MMmmm... Yummy!


Happy Cooking!


Wednesday, January 15, 2014

Recipe: Easy Smoothies

Well, this new year my goal is to become healthier. 
So basically.. eat less crap and eat more foods that will help improve my body and overall health.

In our previous post on the importance of having a morning routine,
we talked about how breakfast is the most important meal of the day. 

Trust me... it really is!

Having breakfast in the morning will jump starts your metabolism, 
increase concentration,  help maintain weight (less tempted to over eat later) and give you more energy throughout the day!

I know what your thinking...
..."That's great Sarah, but I don't have time to whip up a balanced meal in the morning"

Trust me you can!


Smoothies are a great way to get a healthy and delicious start to your day
I even like them for a "sweet" snack in the evening instead of ice cream.

All you have to do is throw ingredients such as fruit (fresh or frozen), peanut-butter, spinach, yogurt, oats and juice 
in the blender. Super easy!


Time Saving Tip: At the start of your week, pre-portion your non-liquid ingredients (not milk, juice, yogurt) into small freezer Ziploc bags. Label and freeze. When you are rushing around your house in the morning, all you need to do is dump the contents of the bag into your blender, add your liquid of choice and blend!

**If you want to pre-portion your liquids as well - try freezing your juice, yogurt, almond milk or coconut milk in ice cube trays. Once frozen, break into cubes and place a few into your portioned Ziploc baggies. 


Here are some easy smoothie recipes to get you started: 

(Add more protein to any recipe by adding a serving of protein powder!)

Strawberry Coconut Smoothie
Place 8 frozen strawberries, 1/2 cup unsweetened shredded coconut and 1/2 cup plain yogurt into a blender. Blend until smooth. Serves 1

Pineapple Green Smoothie
Place 1/2 cup kale, 1/2 cup frozen pineapple, 1/2 cup plain yogurt, and 1/4 cup water into a blender. 
Blend until smooth. Serves 1.

Chocolate-Banana Smoothie
Place 1 peeled- frozen bananas, 2 Tbs peanut-butter, 2 Tbs cocoa powder, 2 Tbs rolled oats, 
and 1/2 cup water into a blender. Blend until smooth. Serves 1.

Spiced Pumpkin Smoothie
1 cup ice, 1/2 cup milk, 1/3 cup pure pumpkin puree, 1 Tbs honey, and a dash of nutmeg. 
Blend until smooth. Serves 1.

Blueberry Green Tea Smoothie
Ingredients: 1/2 c. frozen blueberries, 2 cups green tea (room temperature), 1 Tbs Agave nectar (or honey)
Divide blueberries among the compartments of an ice cube tray. Fill tray with green tea and freeze. Place frozen cubes, remaining tea and agave nectar into blender. Blend until smooth. Serves 2.


 What is your favorite smoothie recipe?
Add yours below in the comments box!


Monday, January 13, 2014

Recipe: Twice Baked Potatoes

Growing up my mom would make twice baked potatoes here and there, and they were always my favorite. Nothing is better than having potatoes topped with cheese and broccoli! Yum! These are great to have in the freezer for a quick side dish :)
Tonight I paired these with garlic and herb chicken. Turned out great!


What you need:
4 medium sized potatoes
1 c. broccoli- steamed
2 c. shredded cheddar cheese (save some to top potatoes)
1/2 c. low-fat sour cream or cottage cheese
1/3 c. low-fat ranch dressing
1/2 tsp. garlic powder
Salt and Pepper


Step 1:  Wash potatoes and poke holes using a fork. Cover each potato with foil and bake for 1 hour at 400 degrees.
  Remove from oven and foil. Lets potatoes cool and slice in half length-wise. Hold potato in hand and scoop out inside, leaving 1/2- 1/4 inch in the skin (use towel or napkin to protect hands). Place insides in a medium bowl.

Step 2: Mash potato with fork or masher (leave somewhat lumpy). Stir in broccoli, cheese, sour cream, ranch, and garlic powder. Mix well.

Step 3: Spoon mixture into the potato skins. Top with more cheese. Season with salt and pepper. (If freezing, continue to freezing instructions).

Step 4: Bake 15-20 minutes more at 400 degrees.


To Freeze: After assembling (do not bake second time) wrap each potato in plastic wrap and place them in a large freezer bag (label bag with heating instructions). To serve: Take out of plastic wrap. Bake at 400 degrees for 30 minutes or until heated through.

Enjoy!

Tuesday, January 7, 2014

Recipe: Fro-Yo Blueberries

I have a bit of a sweet tooth. and I love to munch, so I am working on finding fun snacks to have on hand for whenever the craving strikes! Here is an awesome, super simple recipe for a sweet and super healthy treat!


What you will need:
-Fork
-Aluminum Foil
-Cookie Sheet
-Ziploc baggie or container to hold your finished blueberries
-1 Package Fresh Blueberries
-1 container of thick Vanilla yogurt (I love Activia, Yoplait Thick and Creamy, or Greek Yogurt)


Step 1:
Wash and dry your fresh blueberries
Step 2:
Cover your cookie sheet with the aluminum foil
Step 3:
Open and stir your yogurt, begin dipping the blueberries in the yogurt fully covering them, then placing them on the aluminum foil. (I tried using toothpicks but the blueberries really didn't stick, so a fork and your fingers will work!)
Step 4:
Once you have covered all of your blueberries pop the filled cookie sheet in your freezer for 1 hour
Step 5:
Pop all of the blueberries off the sheet and put them in your Ziploc bag or storage container, and you are done! Told ya it was easy!...and delicious!

Monday, January 6, 2014

Recipe: Whole Wheat Spaghetti Pie

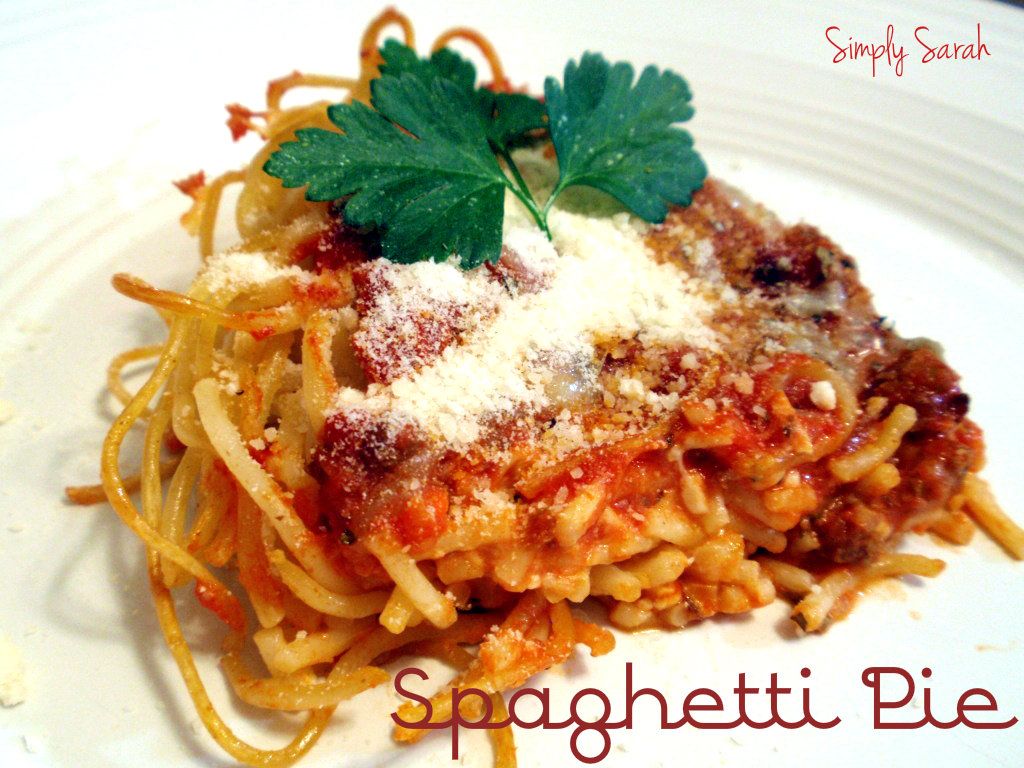
Wondering what to do with your leftover spaghetti noodles and meat sauce? Why make another meal of course!
     Spaghetti Pie was a family favorite growing up. Not only because its easy and has all the yummy flavors of regular spaghetti, but it freezer friendly! Just prep, freeze, and then bake when your ready for a meal with little effort!


What you need:
Pie plate
7 oz cooked whole wheat spaghetti noodles
 2 Tbs butter
1/3 c. shredded Parmesan cheese
2 beaten eggs
1 c. low-fat cottage cheese
1 c. shredded mozzarella cheese
1/2 lb browned- lean hamburger or ground turkey (I usually add oregano)
1/4 c chopped onion or  sprinkle of onion flakes
1 small jar all-natural spaghetti sauce of your choice


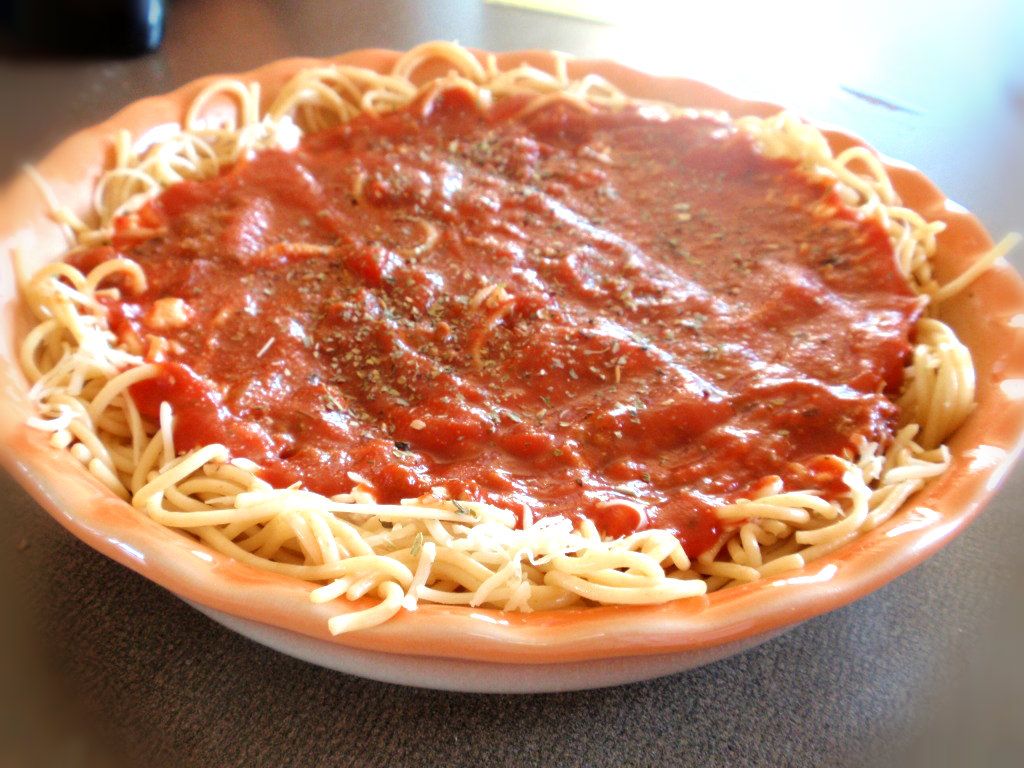
Step 1: In a bowl, mix together noodles, melted butter, Parmesan cheese and eggs. Place on bottom of pie plate like a "crust".

Step 2: Next add the next layer: cottage cheese and 1/2 c mozzarella cheese.

Step 3: In a skillet, brown hamburger with onion (i added oregano). Drain. Add meat layer to your pie plate.

Step 4: Pour a layer of sauce on top.

Step 5: Bake uncovered for 350 degrees for 30 minutes. Add more mozzarella cheese. Bake 5 more minutes until cheese starts to be golden. Remove from oven and let stand 5 minutes before cutting.

Pair with a fresh salad and a glass of wine! Enjoy!

Saturday, January 4, 2014

Recipe: Banana Peanut-butter Bites


These little guys are perfect for snacking, pre workout and party platters.
Bananas and peanut-butter will replenish your energy after a workout.


    Ingredients: 
          1/4 cup Creamy Peanut Butter          
2/3 cup Greek Vanilla Yogurt
2 Bananas


    1.     Peel banana and slice banana into slices roughly the width of your thumb.
            Hint: Try to cut the tops of the pieces horizontally so the mixture doesn't fall off.


     2. Combine peanut butter and yogurt into a bowl and mix until blended.       


      3. Place a nickel-sized amount on the top of the banana piece and take another piece and place gently on top.
    Hint: Do not push down on mixture to hard otherwise it will squish out.


    4. Place onto platter or tupperware. Freeze for 15 minutes to harden and Enjoy!

    Serving suggestions: Use toothpicks to hold pieces together to serve on a platter.


    Be proud of your healthy snack!


    Thursday, January 2, 2014

    Recipe: On-the-Go Breakfast Muffins

    Lets be honest, there is nothing like a crazy busy morning.
    Whether you are a student running to class, a working lady zipping off to the office or just trying to please your lil' picky eaters- grab and go breakfast ideas are a MUST!
    These easy breakfast muffins are packed with hidden veggies, oats and a tad of spice! Best of all they freeze and thaw well.

    Here is what you need:

    Muffin Pan (I used regular but mini works too!
    Cooking spray
    6 Tbs butter, melted
    1/4 c. brown sugar
    1-2 bananas, mashed
    1/2 c. applesauce
    1 c. shredded summer squash (could use zucchini or carrots as well)
    2 eggs
    1 c. whole wheat flour
    1/2 c. oats
    1 tsp baking soda
    1/2 tsp of each: nutmeg (heck yes!), cinnamon, and salt

    Enjoy!


    Step 1: Preheat oven to 375 degrees F and grease muffin pan.
    Step 2: Cream together butter and sugar. Stir in bananas, squash and eggs.
    Step 3: Stir in flour, baking soda, oats and spices. Just stir until combined.
    Step 4: Bake in a 375 degree oven for 15 minutes.


    Recipe: Hearty Lentil Soup


    I thought this hearty and healthy soup would make great lunches and keep me fuller longer. Yay for fiber! Lentils are great! They are low in calories and high in nutrition.


    This soup also freezes well. Put in individual size containers before freezing for easy lunches :)

    What you need:

    2 cups dried lentils, rinsed
    4 cups water
    4 cups broth (beef, chicken or vegetable works fine)
    3/4 cup chopped onion
    1/2 cup chopped celery
    1 cup chopped carrots
    1.4 cups chopped fresh parsley
    4 teaspoons minced garlic (i used a lot more. LOVE garlic!)
    2 teaspoons salt
    1/4 teaspoons pepper
    1/2 teaspoons dried oregano
    15 ounces canned diced tomatoes, undrained
    2 Tablespoons red wine vinegar


    Step 1: Place lentils in slow cooker and cover with water.  

    Step 2: Add onion, celery, carrots, parsley, garlic, salt, pepper and oregano.  

    Step 3: Cover and cook on low for 8 hours.  Add tomatoes and red wine vinegar.  Heat through for 15 minutes.  

    I served mine with a few slices of french bread. Enjoy!

    Recipe: Navy Bean and Ham Soup


    Well, Christmas is now over.
    Time to slowly take down all the holiday decorations and clean up all the shredded wrapping paper from the living room.  Which brings me to my one of my first projects on my to-do list- turning our unfinished lower level into a play room. Between recent birthdays and Christmas, I'm drowning in toys, toys and more toys. It's time to make a place for the girls to play and have fun without me and Hubby worrying about tripping over everything. But that project and post is for another day.
    Today, I want to share my great-grandmothers navy bean and ham soup. This soup is perfect for leftover holiday ham, or if you are like me, and purchased a ham during after holiday sales.
    This soup freezes well, so its great to make in a big batch.
     Easy protein packed lunch idea anyone?
    This recipe can be altered a little bit, depending on how much ham you have.

    I used 2 lbs of dried navy beans
    Roughly a 1 1/2 lbs cooked ham (diced)
    1 onion (diced)
    3 carrots (diced)
    3 celery stalks (diced)
    garlic powder - to taste
    seasoning salt- to taste
    dash of cayenne pepper
    dash of pepper
    1/4 tsp.baking soda

    Soak beans over night. In morning, boil about 15 minutes.
    Add 1/4 tsp baking soda. Boil about 2-3 minutes more. Drain and rinse.
    Cover beans with water. Add ham (and ham bone if you still have it). Also add chopped carrots, onion and celery.
    Season to taste. Simmer for 2 hours and remove ham bone before serving.

    Enjoy!


    Happy Cooking!
     
    01 09 10