Showing posts with label DIY. Show all posts

Wednesday, March 4, 2015

Tea with the Bride-to-Be!

A Bride-to-Be and a Sip of Tea!

In honor of our lovely co-author Grace 
walking down the aisle soon
I thought it was appropriate to share a glimpse into her bridal shower. 

Bridal showers are wonderful.
They are happy
A time to celebrate love

But lets be honest, 
for the bridesmaids who have to plan it
It can be a bit intimidating and a lot of pressure. 

So here are my stress-free tips to planning a bridal shower

Tip #1: Pick A Theme
Parties that have a theme are so much fun! They set a tone for your event 
and it allows your guests to get involved.
 Why not suggest a certain attire? 
 If your theme is a fiesta.. suggest tropical attire or sombreros.
Hosting a brunch?....sundresses
A traditional shower? ..suggest that the guest wear the brides wedding colors.
Make it fun!
For Grace's shower we choose to have a Tea Party theme!
On the invitation we suggested wearing your favorite tea attire of sundresses and hats!
Everyone loved dressing up.


Tip #2: Pick a Color Pallet
By picking a color pallet you can enhance your theme and make everything cohesive.
By adding to make colors in the mix, your decor might end up looking mis-matching and confused. 
Keep it simple. 

For the tea party we focused on light pink and pastel purple.


Tip #3: Details, details, details
Decor can set the mood for your guests. No need to go crazy on the budget. Its amazing what a little tissue paper, candles, and flowers can do. Keeping your theme and colors in mind will help guide you. You cant go wrong.


Try a chalk board sign, homemade bunting banner, and mason jars with flowers for easy decor.


We were so blessed to have our cousin Emily Moher 
create these BEAUTIFUL flower arrangements for the tables!


Tip #4: Food
This aspect of party planning can be the most stressful and lets be honest, pricey. 
The best way to keep your guest and your wallet happy is quantity over variety. Keep your menu simple. 
Most showers are hosted in the afternoon or late morning when its common to have a lighter lunch. 
Think finger food. Something that the guests can socialize and eat at the same time.


We served a fruit salad, veggie platter with dip, deli roll ups (aka pin wheels), pasta salad and a variety of dessert items. This menu was simple and best of all we could do a lot of the prep work the day before. 
 For beverages we served hot tea, ice tea, 
lemon and cucumber infused water and wine (well it is my family after all)


I hope you found some of these tips helpful when planning your event.


Congrats Grace! We are so excited for your big day!


Friday, February 7, 2014

DIY: Inspiration Board

Lately I have realized that I have lost my motivational momentum. I have found when I frequently view images and encouraging words that I get more done and eat cleaner. In honor of my yearning to keep on the path of success I have started my fiance and I decided to create an inspiration board for our living room. I encourage you to try to make one as well!

Supplies:
  • Cork board ( to keep the look classy purchase one with a frame)
  • Flat tacks
  • Magazines that inspire you


Instructions:
  1. Hang up cork board in a frequent focal point of your home. 
  2. Go through your magazines and cut out pictures and words that give you that feeling of motivation. (you will recognize it as the feeling you get that you want to start doing your dream activity this instant!)
  3. Tack the pictures up in a way that makes your board pleasant to look at.
  4. You are done! Feel free to add or remove pictures and words as your goals change!

Hint: When creating your board please put up healthy inspirations. You should put up things that inspire you to do beautiful things in your life and to lift you up, not beautiful people you want to look like and shoes you want to buy. You need to look within for happiness.


Wednesday, January 22, 2014

DIY: Lacey Book Page Glass Candle Holder

Well I couldn't come up with a great name for this project so I gave it a long one! Here is a great simple little project that takes about 10 minutes and has awesome results!


What you will need:
-A sponge, or sponge brush, or even a paint brush would work
-Mod Podge, I used a Matte finish
-A few pages from a book, cream pages work best
-A glass candle holder (mine was $1.00 from Michaels)
-A flower punch ($3.00 from Michaels)
 
(Don't mind my couch, it's my favorite crafting location!)
 
 
Step 1:
Use your flower puncher to punch out a bunch of little flowers from the book pages.
 
Step 2:
Start by placing a dab of the Mod Podge on the glass candle holder, then spread it out using your sponge brush (I used a dabbing motion) you will be working in small sections at a time.


Step 3:
Begin placing your flower punches randomly onto the gluey surface. Once you have them on use your sponge brush to dab over the top of them so that they are all coated in the Mod Podge.
 
Step 4:
Continue this until the entire surface of the candle holder is covered (I did not do the bottom, but you could if you want to!)


Step 5:
Let it dry, once it is completely dry, place a tea light candle inside and enjoy!


Friday, January 3, 2014

DIY: The Ugly Chair Project

This is one of my all-time favorite projects, it is a great inexpensive way to bring a little life to a room in your home! It always amazes me when I see chairs like these selling for $100+, especially when I'm, about to show you how for less than $15.00

First things first, if you have a smartphone, download the free JoAnn's Fabrics app... free coupons!! I got my fabric for 40% off.


Here is what you need:
An ugly chair! (mine was free from a garage sale)
Staple Gun (borrowed mine from my dad)
Plenty of staples
Hammer
Scissors
Screw Driver (Philips or flathead depending on your chair)
Hot glue gun, and glue
Pliers (not all of you will need them, but they helped me!)
Spray paint, gloss finish is preferred (sand paper too if you must)
Fabric, depending on the size of your chair usually 1-2 yards is fine, I used 1.5 yards, I also bought some white fabric to use as before my "fancy fabric" so that there was no see-through.
Furniture piping/cord/trim (can be found by the ribbon usually at fabric stores)
Furniture tacks.


Step1:
Take your chair apart. Each chair is going to be built differently, for my chair I just needed to flip it upside-down and unscrew the seat from the chair, super easy. (save the screws!)
Step 2:
Here you may need to get a little creative, but basically I used a combination of my scissors and a pair of pliers to rip the trim and gross leather off of the chair. I stripped everything down so only the wood and padding was left.
Step 3:
Once you have all the fabric gone, it is time to paint the base. If your chair has a finish or lacquer on it, it would be a good idea to run some sand paper over it to help the pain adhere. I decided to have a lazy day and skip the sanding and go straight to painting. I used long even strokes with the spray paint, and did about two layers to make sure the wood color did not show through.


Step 4:
While the chair was drying I went inside to work on reupholstering the seat of the chair. I started by laying my white fabric on the floor and setting the seat upside down on top of it, making sure there was plenty of fabric on each side.


I started with the very front of the seat by wrapping the fabric up and placing one staple with my staple gun in the center of the front edge. Then I went to the opposite side and pulled the fabric as tightly as possible placing the second staple directly across from the first staple, right in the center of the back edge of the seat. I did the same thing for the right and left side of the seat. Keeping the fabric pulled as tightly as possible I started placing staples all the way around the edges about a half inch apart from each other. The corners can be a little tricky since the fabric gets a little bunched, but just manipulate and fold the fabric as needed, and keep pulling tight, a few extra staples in the corners is always a good idea!
Step 5:
repeat step 4 except this time with the "fancy" fabric you have chosen. Something to be mindful if you have chosen fabric with a pattern is which way you want the pattern of the fabric to be when you get it on the chair. If you look at mine all of the fabric on the chair seat and the chair back are going the same direction.


Step 6:
By this time my chair frame was dry so I brought it in to cover the backrest with the fabric.


I used the same process as the seat, adding the white fabric first, then the "fancy" fabric. I started my staples at the very middle of the top, then pulled tight to the bottom. I placed the staples as close to the edge where the chair frame begins as possible. The real trick is just keeping the fabric as tight as you can, sometimes it helps to have a friend pulling the fabric while you staple.
Something to keep in mind while doing the backrest is that you will need to cover the staples with the trim you bought, so try not to be a little more aware of where and how you are placing the staples.
Step 7:
Trim all excess fabric from the chair backrest and the bottom of the seat you have just covered. By this time is starting to look good!
Step 8:
I put the chair seat back onto the chair frame and screwed it back in place.
Step 9:
I used my hot glue gun to glue the piping/cord/trim around the exposed edges of the backrest, making sure to cover all of the staples.

Step 10:
Now for the fun part, I used a hammer and metal tacks to add a decorative element to the edges of the chair


Step 11:
If there are any paint touch-ups now would be time to do them, otherwise you are done! Enjoy your awesome new chair!


DIY: Menu Planning Board

So, I finally got sick of putting my weekly menu on a piece of paper, stuck to the fridge. How boring and not pretty at all! So to make meal planning a little more exciting, I decided to make a dry erase menu for my kitchen (and I was feeling crafty).


 Now, I can post my weekly menu and stay organized!


~~~


This project is SUPER easy and quick!


Here is what you need:


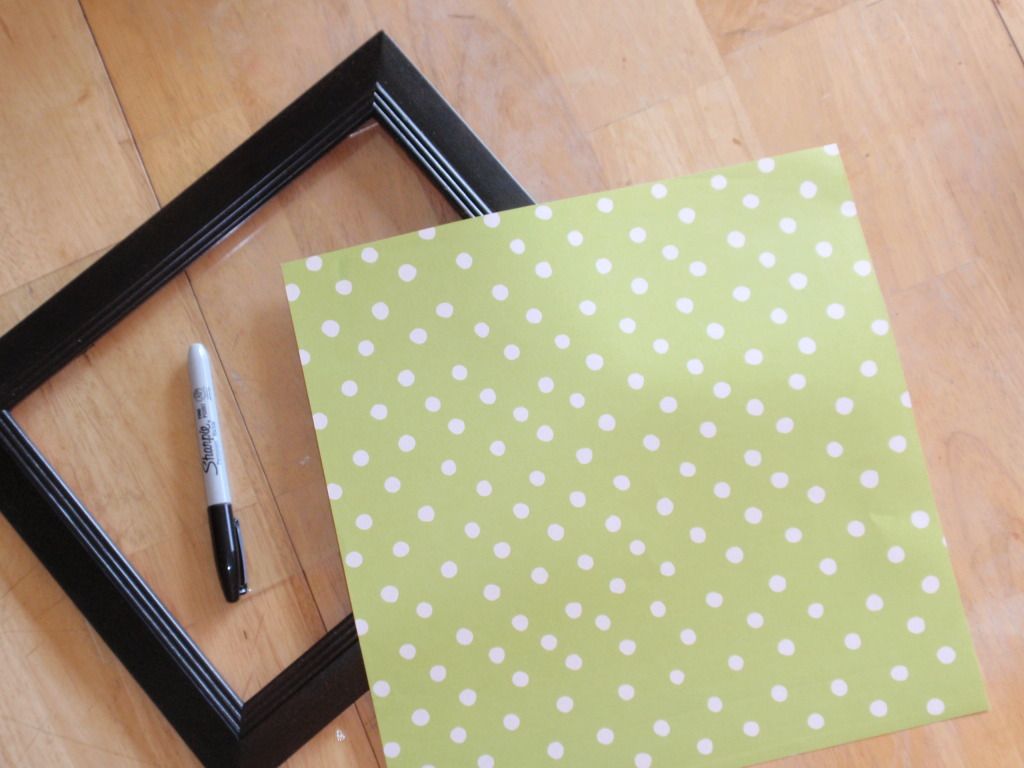
1 large frame with glass
 ( I got mine at the thrift store for $1.99! Added a little black paint and it looked as good as new!)
Piece of patterned paper of your choice
Black permanent marker
Dry-erase marker


Step 1: remove backing and glass from the frame.
Step 2: Use glass to measure and trace around the paper. Cut the paper on the line to fit into the frame.
Step 3: With the permanent marker, write MENU on top and each day of the week down the left hand side. Place back into frame and assemble (like you would a picture).
Step 4: Using the dry-erase marker- write your weekly meals! As the week comes to an end, simply erase with cloth and re-write again!


Simple and easy, right?

01 09 10