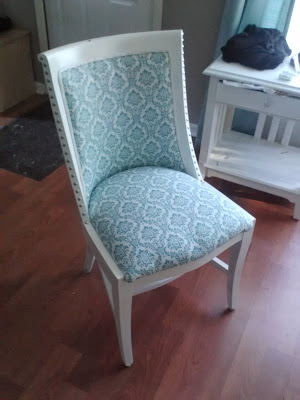
This is one of my all-time favorite projects, it is a great inexpensive way to bring a little life to a room in your home! It always amazes me when I see chairs like these selling for $100+, especially when I'm, about to show you how for less than $15.00
First things first, if you have a smartphone, download the free JoAnn's Fabrics app... free coupons!! I got my fabric for 40% off.
Here is what you need:
An ugly chair! (mine was free from a garage sale)
Staple Gun (borrowed mine from my dad)
Plenty of staples
Hammer
Scissors
Screw Driver (Philips or flathead depending on your chair)
Hot glue gun, and glue
Pliers (not all of you will need them, but they helped me!)
Spray paint, gloss finish is preferred (sand paper too if you must)
Fabric, depending on the size of your chair usually 1-2 yards is fine, I used 1.5 yards, I also bought some white fabric to use as before my "fancy fabric" so that there was no see-through.
Furniture piping/cord/trim (can be found by the ribbon usually at fabric stores)
Furniture tacks.
Step1:
Take your chair apart. Each chair is going to be built differently, for my chair I just needed to flip it upside-down and unscrew the seat from the chair, super easy. (save the screws!)
Step 2:
Here you may need to get a little creative, but basically I used a combination of my scissors and a pair of pliers to rip the trim and gross leather off of the chair. I stripped everything down so only the wood and padding was left.
Step 3:
Once you have all the fabric gone, it is time to paint the base. If your chair has a finish or lacquer on it, it would be a good idea to run some sand paper over it to help the pain adhere. I decided to have a lazy day and skip the sanding and go straight to painting. I used long even strokes with the spray paint, and did about two layers to make sure the wood color did not show through.
Step 4:
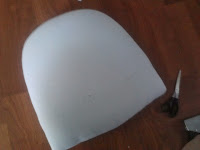
While the chair was drying I went inside to work on reupholstering the seat of the chair. I started by laying my white fabric on the floor and setting the seat upside down on top of it, making sure there was plenty of fabric on each side.
I started with the very front of the seat by wrapping the fabric up and placing one staple with my staple gun in the center of the front edge. Then I went to the opposite side and pulled the fabric as tightly as possible placing the second staple directly across from the first staple, right in the center of the back edge of the seat. I did the same thing for the right and left side of the seat. Keeping the fabric pulled as tightly as possible I started placing staples all the way around the edges about a half inch apart from each other. The corners can be a little tricky since the fabric gets a little bunched, but just manipulate and fold the fabric as needed, and keep pulling tight, a few extra staples in the corners is always a good idea!
Step 5:
repeat step 4 except this time with the "fancy" fabric you have chosen. Something to be mindful if you have chosen fabric with a pattern is which way you want the pattern of the fabric to be when you get it on the chair. If you look at mine all of the fabric on the chair seat and the chair back are going the same direction.
Step 6:
By this time my chair frame was dry so I brought it in to cover the backrest with the fabric.
I used the same process as the seat, adding the white fabric first, then the "fancy" fabric. I started my staples at the very middle of the top, then pulled tight to the bottom. I placed the staples as close to the edge where the chair frame begins as possible. The real trick is just keeping the fabric as tight as you can, sometimes it helps to have a friend pulling the fabric while you staple.
Something to keep in mind while doing the backrest is that you will need to cover the staples with the trim you bought, so try not to be a little more aware of where and how you are placing the staples.
Step 7:
Trim all excess fabric from the chair backrest and the bottom of the seat you have just covered. By this time is starting to look good!
Step 8:
I put the chair seat back onto the chair frame and screwed it back in place.
Step 9:
I used my hot glue gun to glue the piping/cord/trim around the exposed edges of the backrest, making sure to cover all of the staples.
Step 10:
Now for the fun part, I used a hammer and metal tacks to add a decorative element to the edges of the chair
Step 11:
If there are any paint touch-ups now would be time to do them, otherwise you are done! Enjoy your awesome new chair!


No comments:
Post a Comment